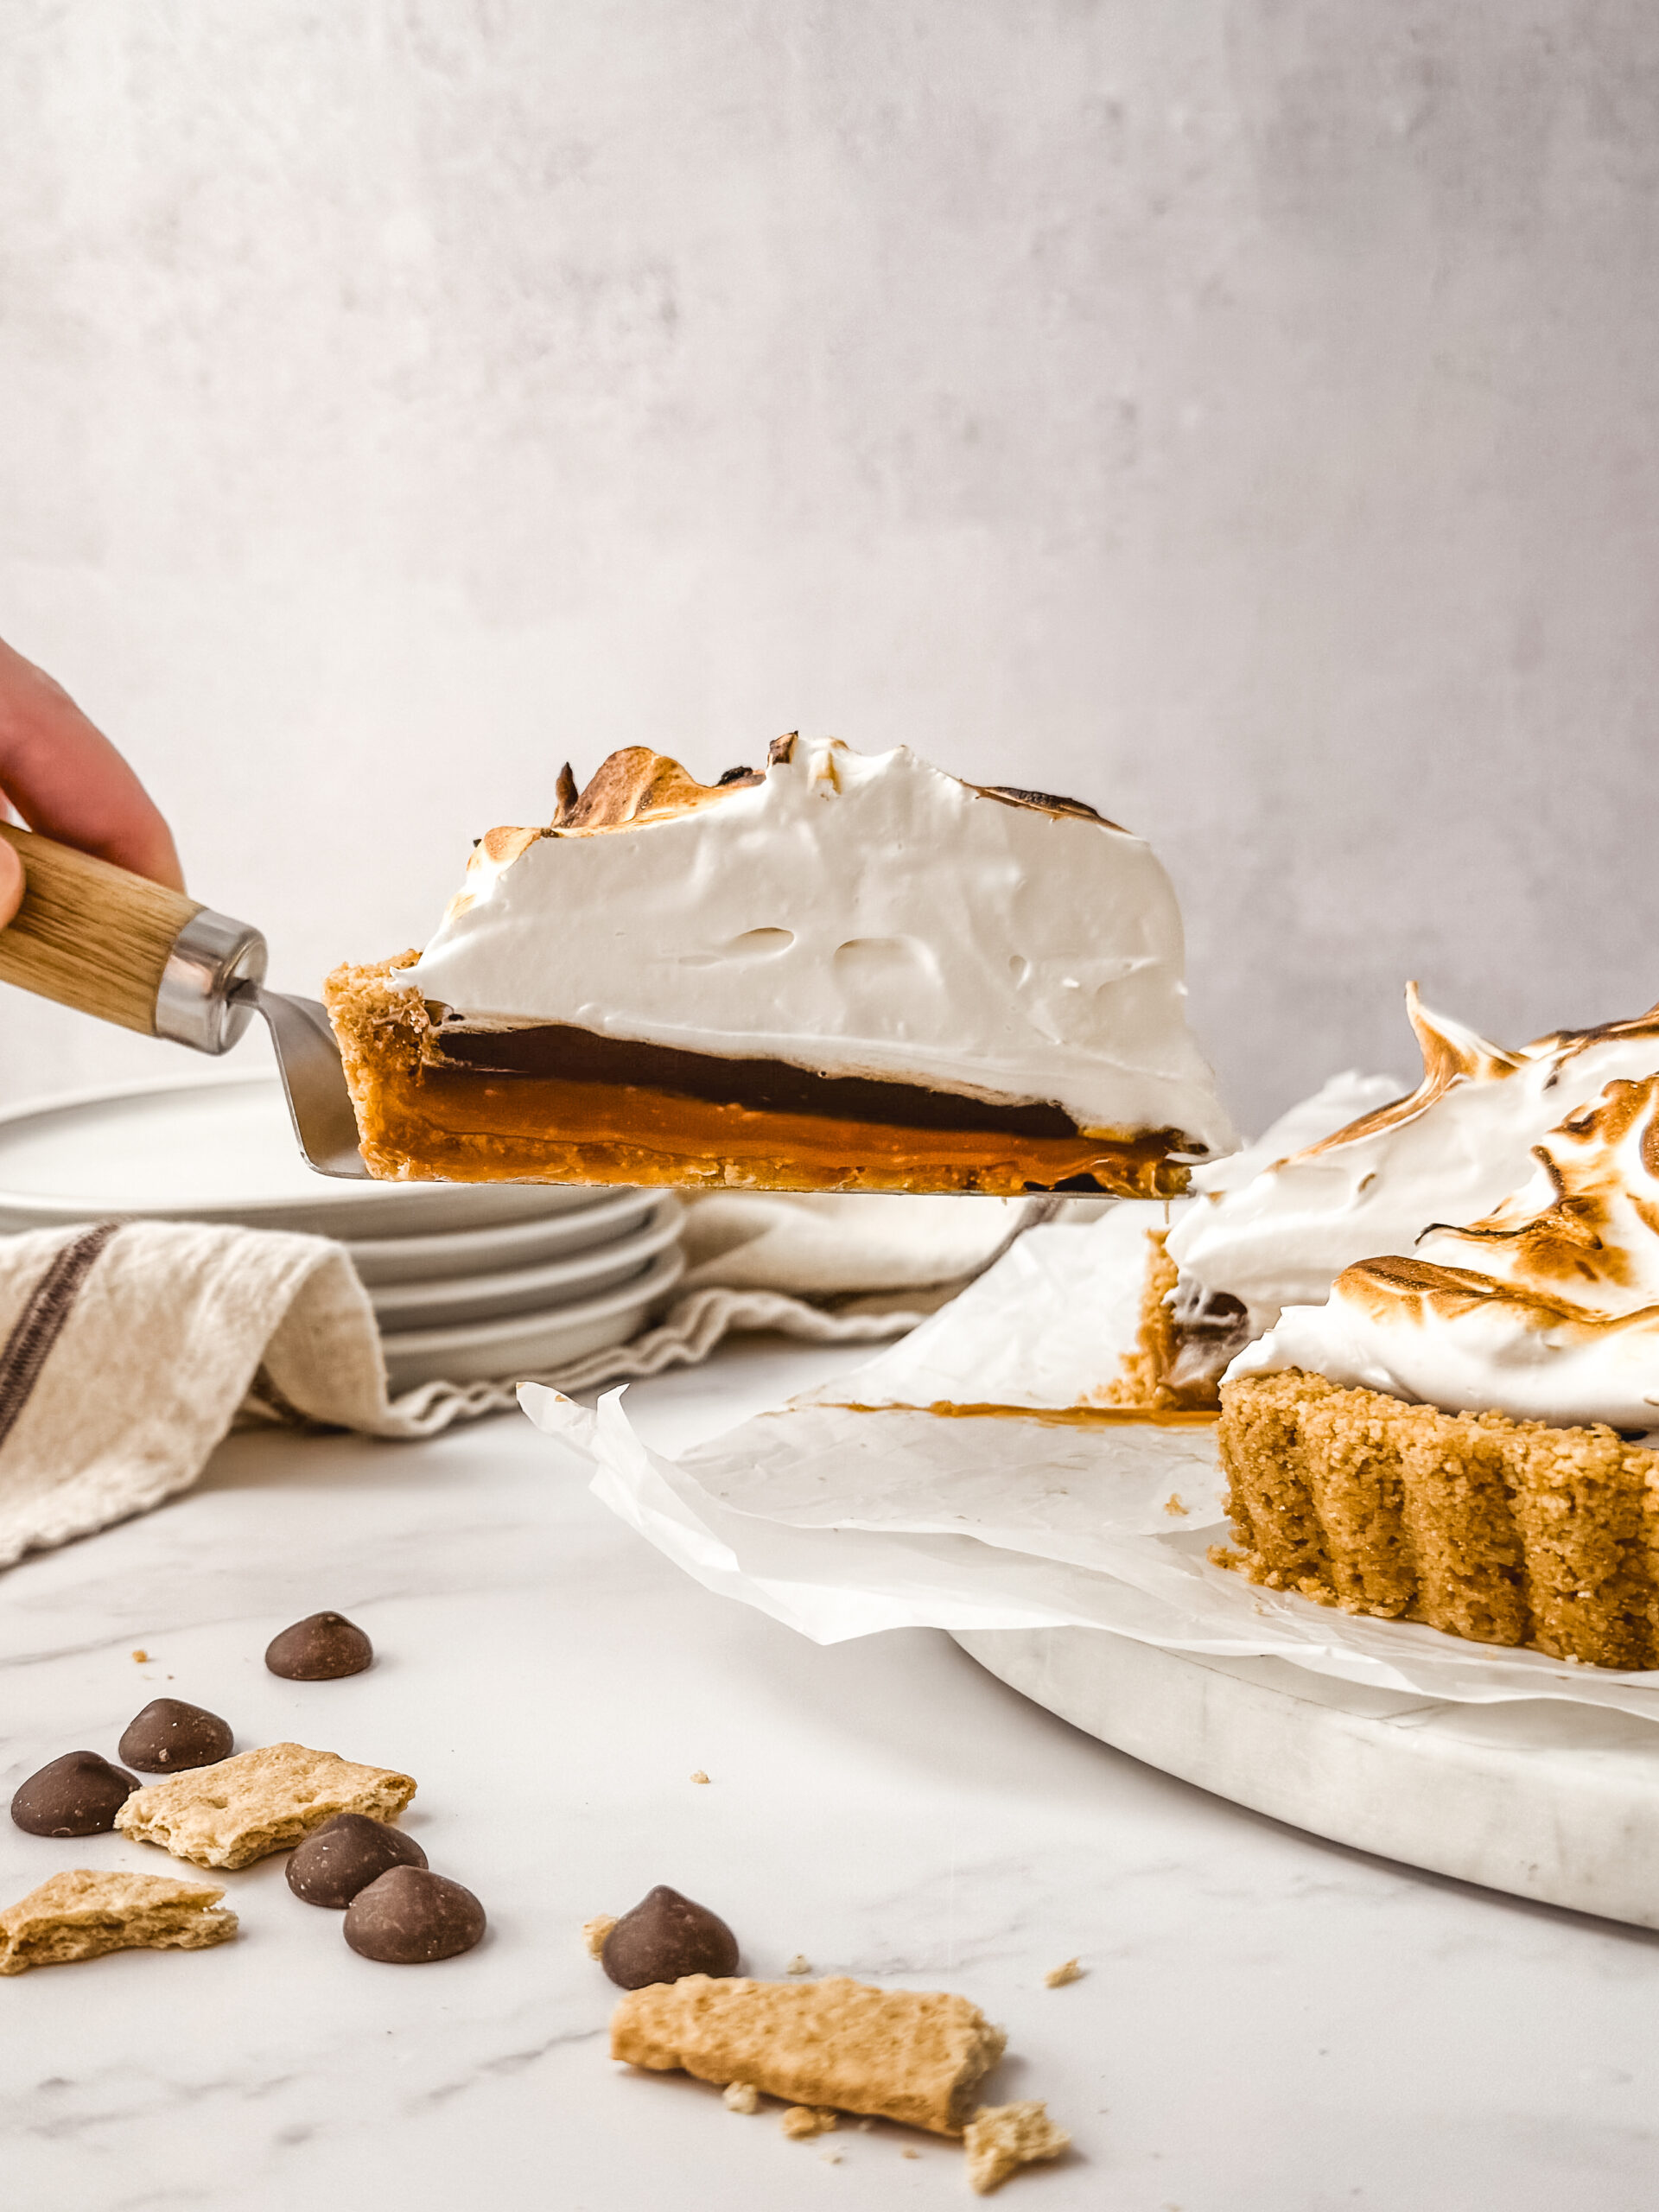

Salted Caramel S’mores Tart
Serves 1230 mins prep25 mins cook
This Salted Caramel S’mores Tart has a buttery graham cracker crust filled with gooey salted caramel and a layer of smooth chocolate ganache piled high with toasty marshmallow meringue.
0 servings
What you need
cup granulated sugar

cup water
tbsp unsalted butter, at room temperature and cut into cubes

cup heavy cream, at room temperature
tsp vanilla extract
tsp coarse sea salt
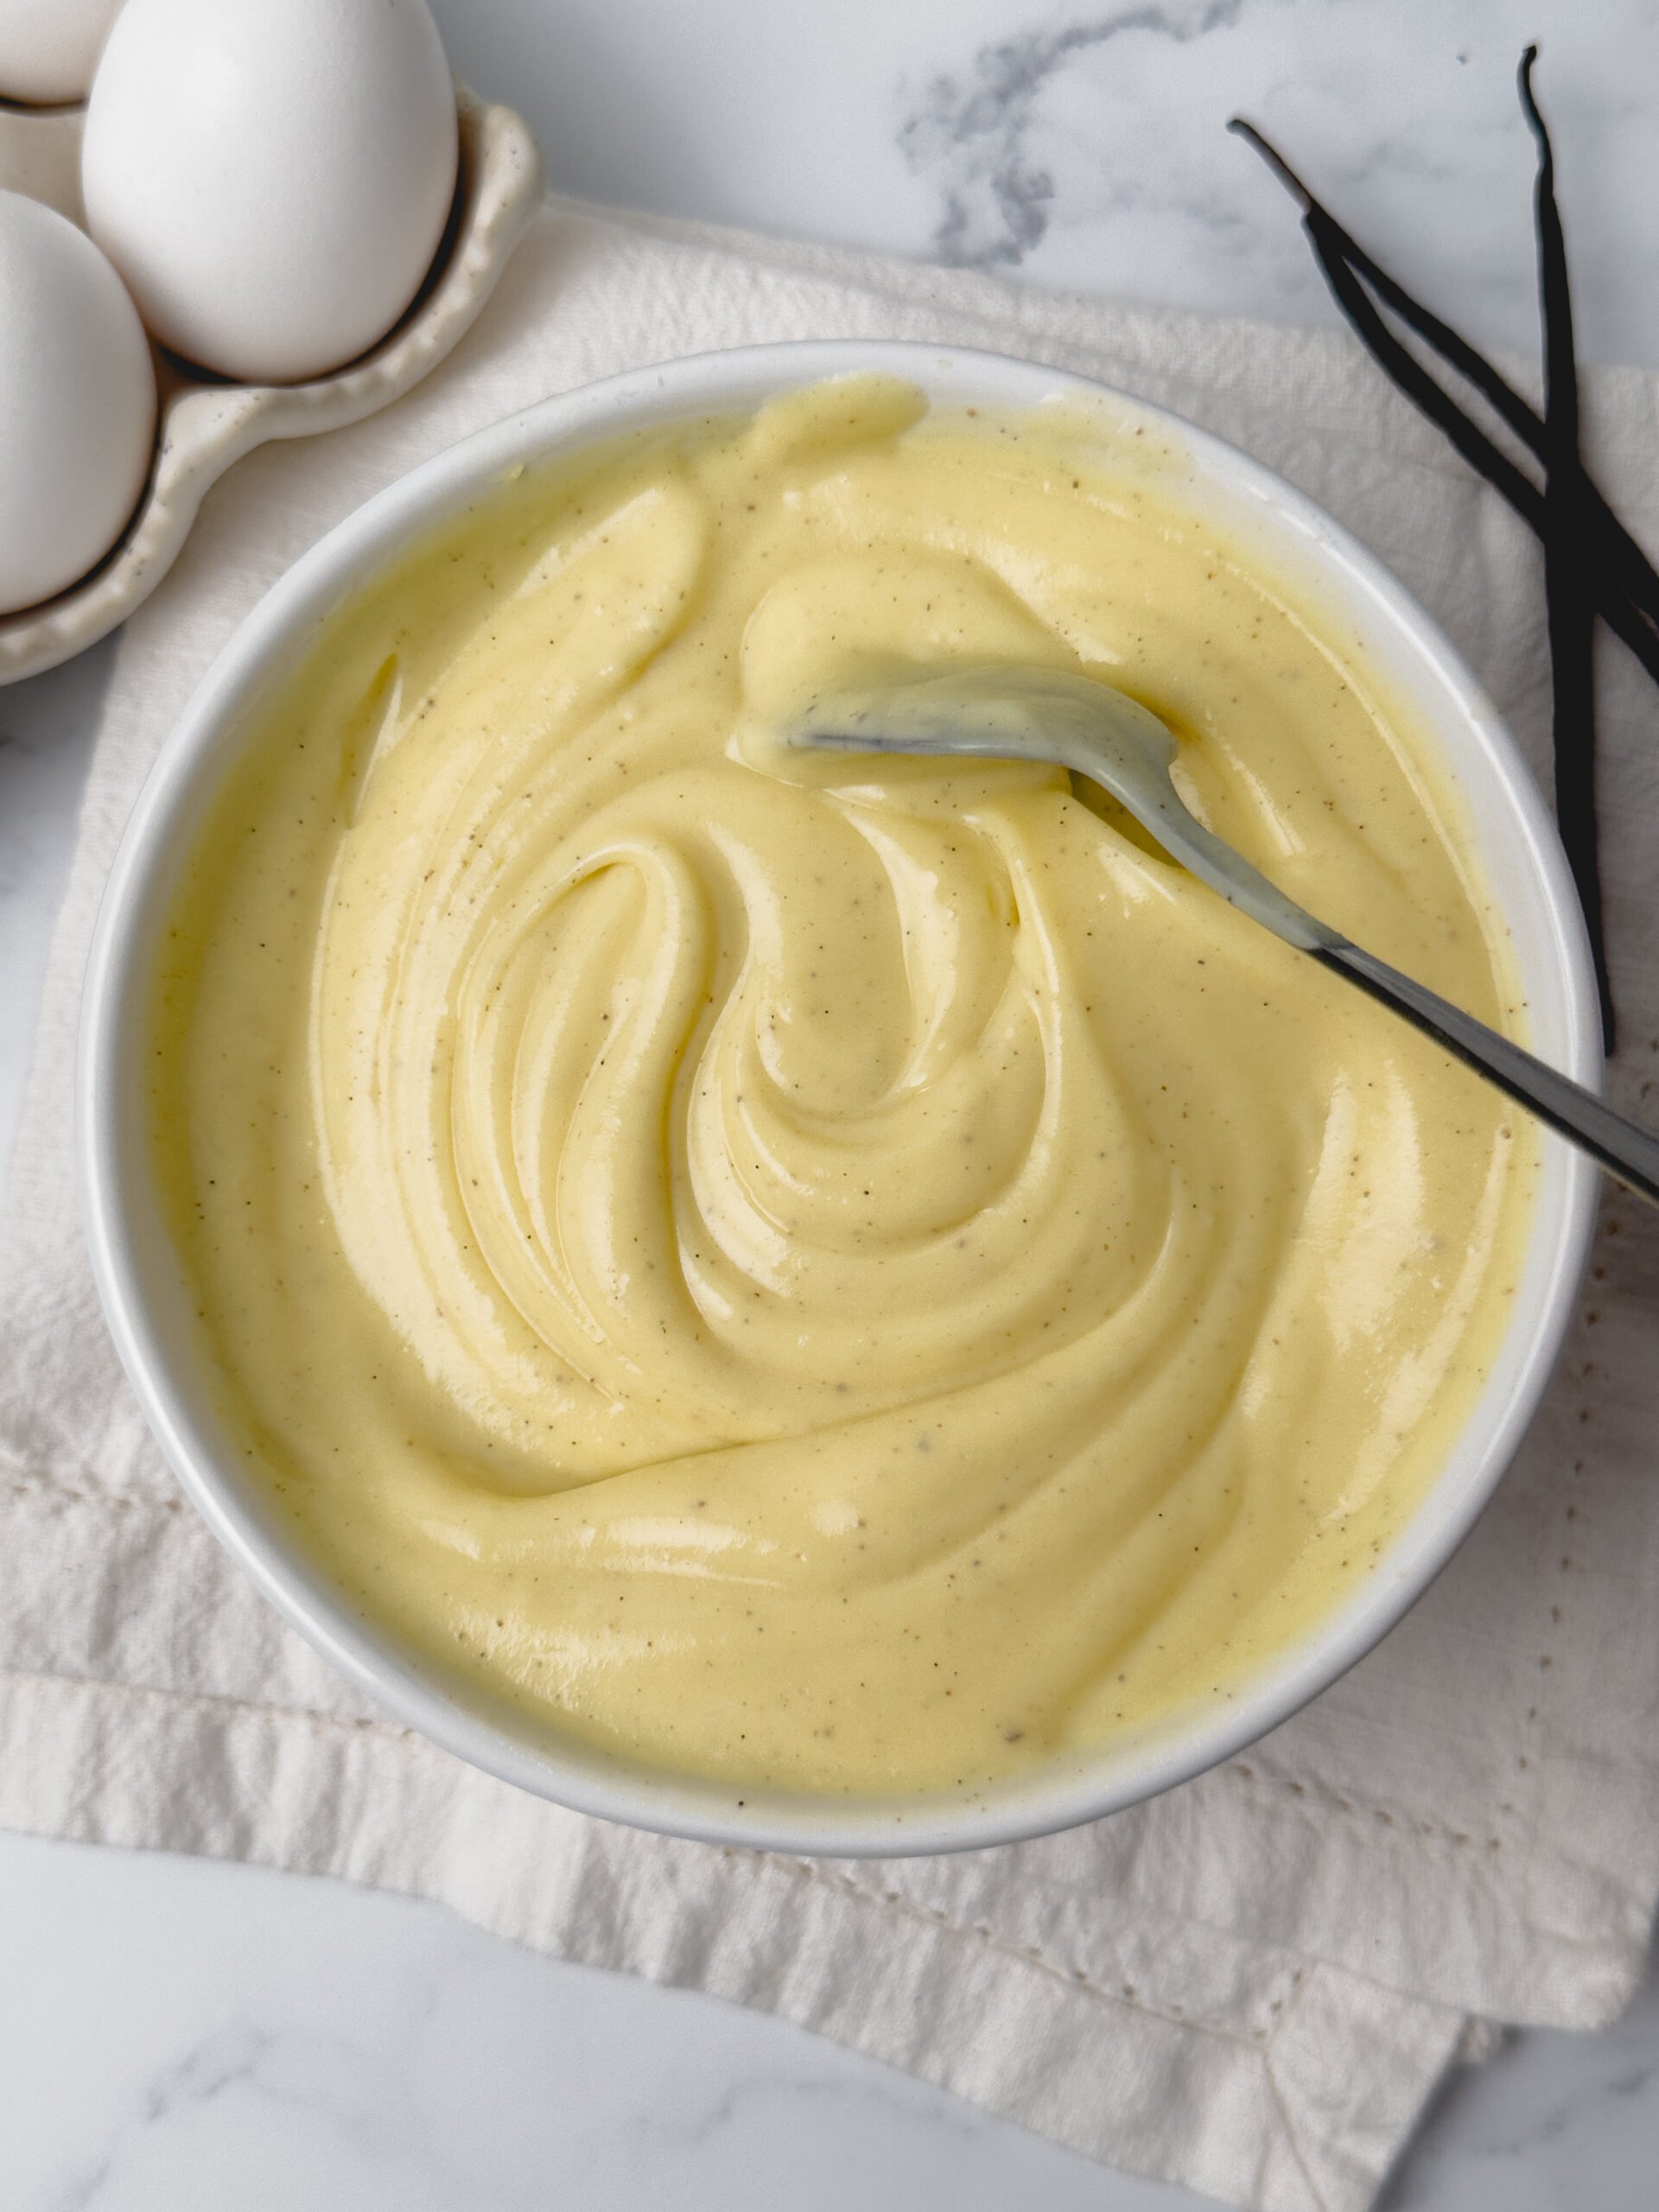
cup graham cracker crumbs, or about 12 full graham cracker sheets

oz bittersweet chocolate, finely chopped
tsp cream of tartar
Instructions
0 Salted Caramel: Combine sugar and water in a small stainless steel saucepan and place over medium heat. Brush down the sides of the pan with water using a pastry brush, to prevent the sugar from crystallizing.
1 Place the lid on and allow the mixture to cook undisturbed (don’t stir!). Check frequently on the sugar and brush down the sides of the pan with water as needed. The mixture will be cloudy at first, then boil and become clear, before starting to carmelize. Swirl the pan occasionally once the sugar begins to caramelize.
2 As soon as the sugar reaches a deep golden amber color, remove it from the heat.
3 Once off the heat, carefully add the butter and whisk until combined. Slowly stream in the heavy cream while continually whisking. The mixture will bubble up vigorously when adding the butter and cream but will settle once incorporated.
4 Strain the caramel through a fine mesh sieve into a heatproof container. Stir in the vanilla and flaky salt.
5 Allow the caramel to chill in the fridge until it has cooled and thickened, for at least one hour.
6 Graham Cracker Crust: Add the graham crackers and sugar to a food processor and pulse to fine crumbs. Add in the melted butter and pulse until the mixture is fully combined.
7 Press the crust mixture firmly and evenly into the bottom and up the sides of a 9” round tart pan with a removable base. Bake at 350°F for 8 minutes, until golden and set. Set aside to cool.
8 Once the tart crust is completely cool, pour the cooled caramel into the bottom and spread it out evenly. Place in the fridge to chill until the caramel is completely set, at least 1 ½ hours.
9 Chocolate Ganache: Once the caramel is completely set, make the ganache. Combine the chocolate and heavy cream in a heatproof dish in the microwave for 20 seconds, then stir the mixture together. Repeat this process, stirring each time until the chocolate is completely melted and the mixture is smooth and shiny. Be careful not to overheat the ganache and only heat as needed. Allow to cool for about 5 minutes.
10 Pour the slightly cooled ganache into the tart crust, on top of the caramel layer and spread it out evenly. Chill in the fridge until the ganache is firm.
11 Marshmallow Meringue: Once the ganache has set, make the meringue. Add about an inch of water to a medium pot and bring to a simmer. Check to ensure that the pot is big enough so that the bottom of the metal or glass bowl of a stand mixer fits on top and does not touch the water.
12 Whisk together the egg whites, sugar, and cream of tartar in the mixing bowl. Heat the mixture over the simmering water, stirring constantly until the sugar is dissolved (test by rubbing the mixture between your fingers) or the temperature reaches 165°F with a digital thermometer, about 4 minutes.
13 Remove the bowl from the heat and wipe off any excess water from the bottom of the bowl. Add the vanilla and transfer the mixing bowl onto a stand mixer fitted with the whisk attachment. Whip on high until the meringue gets glossy and creates stiff peaks, about 5 minutes. When you pull the whisk out of the bowl and hold it upright, the meringue should be stiff and hold its shape.
14 Add the meringue on top of the ganache layer of the tart, in a tall mound. Use a small offset spatula to gently push the meringue almost to the crust, leaving a small rim of ganache showing and creating decorative swirls.
15 Use a kitchen torch to carefully toast the meringue. Continually move the torch around and rotate the tart so it doesn’t get too toasty in one spot.
16 To remove the tart from the pan, push up on the base of the pan to release the sides then slide the tart off the removable base. Slice up and enjoy!
View original recipe